Most of us think of skincare as something we slather on instead of eat or drink, but in some parts of Asia one nutrient has been revered for its ability to support youthful-looking skin. For centuries, collagen-rich foods and drinks have been thought to help skin maintain elasticity while boosting hydration, and modern research seems to support this traditional use.
The benefits of collagen are more than skin deep, though. In this article we’ll take a look at its benefits for sleep, mood, muscle growth, bone health and more, plus why supplementation may be helpful as we get older.
First, though, I want to remind you that none of these statements have been evaluated by the FDA, this article is not medical advice, and it is not meant to diagnose or treat any condition. As always, please talk with your healthcare provider about any supplements you are considering. Now that we’ve got that out of the way, let’s dive in.
So, what is collagen?
Collagen is the most abundant protein in our bodies and is often referred to as the “glue” that holds us together. (1) It’s made up of amino acids like glycine and proline that serve as building blocks for our skin, bones, cartilage, ligaments, blood vessels and more.
As we get older, our collagen starts breaking down faster than we can replenish it. We start losing about 1% of our collagen volume per year starting in our twenties, which is why many people begin focusing on collagen supplements.
Fortunately, although collagen proteins are too big to be absorbed through our skin, several studies have shown that consuming collagen does increase the amount our bodies are able to make and use.
There are at least sixteen types of collagen in our bodies, but 80-90% of if is either Type I, Type II, or Type III. Most of the collagen supplements available contain one or more of Type I, II, and III.
Benefits of Collagen
We’ll dive more into the differences between different options later in this article, but first let’s look at the research-backed benefits of collagen.
1. Skin Elasticity & Hydration
Collagen makes up about 75% of the dry weight of your skin, so it’s no surprise that it plays a huge role in skin’s resilience, suppleness, elasticity, and hydration. (2)
In one study, women who took 2.5–5 grams of a collagen supplement for 8 weeks experienced a significant increase in skin elasticity and hydration when compared with those who did not take it. (3)
Another study found that women who stirred a collagen supplement into their drink daily for 12 weeks experienced more skin hydration and elasticity, plus a significant reduction in wrinkle depth. (4)
In another study that used Type II collagen (like this brand) instead of Type I (the most common) for 12 weeks, researchers reported 76% less dryness, 12% fewer visible wrinkles, improved blood flow to the skin, and a 6% higher collagen content. (5)
In another study conducted at the Tokyo University of Agriculture & Technology, researchers looked at the effects of UV exposure on mice that were separated into three groups. Mice were either:
AD
Not exposed to UV light
Exposed repeatedly with increased intensity over time
Exposed repeatedly with increased intensity over time, and fed gelatin
When results were measured, the mice who were exposed to UV light without gelatin experienced a 53% average drop in collagen levels. Interestingly, the mice that were exposed to UV light and received the gelatin supplement actually experienced an average collagen increase of 17%. (6)
2. Healthy Hair & Strong Nails
Although most of the research on the external benefits of collagen focus on skin, the same “glue” plays a role in hair and nail health, too. In one study, participants who were given 2.5 grams of collagen peptides for six months experienced:
an increased nail growth rate of 12%
a 42% decrease in the frequency of broken nails
a 64% improvement in brittle nails (7)
3. May Improve Sleep & Mood
Collagen is rich in glycine, which is an amino acid that’s considered helpful for sleep in a few ways. In one study, for example, when glycine was taken about 30 minutes before bed, the participants fell asleep faster and also experienced improved sleep quality (especially REM sleep).
Glycine also helps our bodies make serotonin, which is a hormone and neurotransmitter that is thought to regulate mood, happiness and anxiety. (8)
Also, serotonin is a building block for melatonin, aka the “sleep hormone.” Research suggests that a deficiency in serotonin can lead to a deficiency in melatonin, too. (9)
4. Supports Joint Health
Collagen is the glue that holds together our cartilage, which helps protect and cushion our joints. Several studies have shown that collagen supplements reduce joint discomfort in athletes and other groups.
In this small(ish) study, 73 athletes who took 10 grams of collagen hydrolysate (collagen that has been broken down to make it more digestible) had less joint discomfort than athletes who didn’t take it. (10)
Similar results have been found in typical adults and other populations. (11) (12)
5. Muscle Growth & Repair
In several studies like this one, participants who took 15 grams of collagen while exercising for 12 weeks showed more of an increase in muscle mass and strength than participants who took a placebo pill. (13)
Collagen is rich in the amino acids arginine and glycine, which are both building blocks for creatine (a compound that helps build muscle and fuels performance).
6. Supports Gut Health
In addition to helping with sleep, the glycine found in collagen also helps balance inflammation in the digestive tract. (14)
Some research has also concluded that it has a protective effect when the gut is exposed to certain types of toxins. (15)
7. May Support Cardiovascular Health
Collagen provides building blocks that make blood vessels soft and supple. Without enough of it, they can become weak and stiff.
In one small study, half of the participants took 16 g of collagen tripeptide for 6 months. They experienced a significant improvement in arterial suppleness and an improvement in LDL cholesterol markers. (16)
Although this research is promising, more is needed to confirm these findings.
8. Wound Healing
Collagen is so helpful for wound healing that it’s used both internally (as a supplement) and topically (as a wound dressing) to support recovery.
We used to think it just provided the raw materials for wound healing, but new research suggests it does more than that. Specifically, it seems to drive several cellular functions that contribute to the healing process, including what type of cells are created, how they move around, and what kind of proteins are built. (17)
In one study, pressure ulcer patients who took collagen supplements (three times a day for eight weeks) healed twice as fast as the control group. (18)
9. Bone Health
We usually think of bone as a bunch of minerals fused together with the help of vitamin D, but actually it’s about 30% protein (mostly type 1 collagen). (19) As I mention in this article on supporting my son’s recovery after a fracture, bone is kind of like a living sponge with mineral crystals embedded throughout.
Our bone mineral density decreases as we get older, but some research has found that participants who supplement with collagen have better density than those who don’t. In fact one study found that post-menopausal women who took collagen for one year actually increased their bone mineral density.
Although this research is promising, more is needed to confirm these findings.
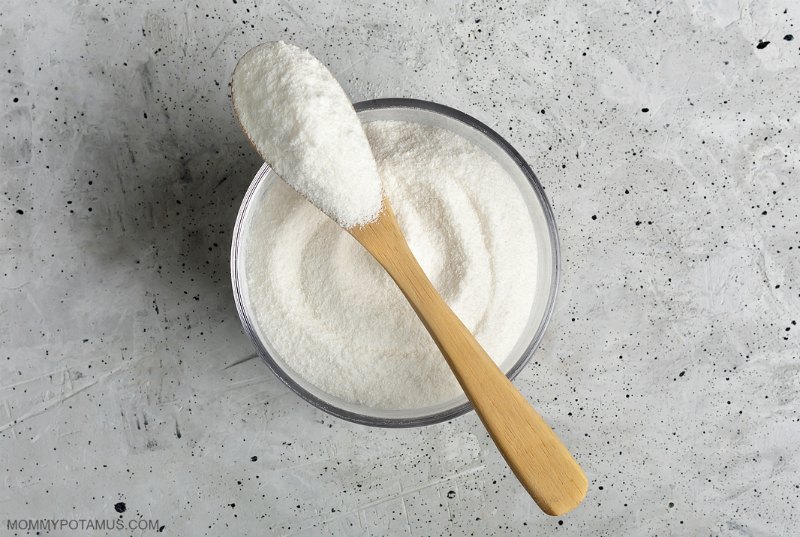
Powdered collagen
What are the best sources of collagen?
Collagen is found in foods such as bone broth and also supplement form.
I like Perfect Supplements brand because it’s affordable and the company has a strong commitment to purity and transparency. They don’t just ask you to trust them when they say their gelatin and collagen are free of pesticides, hormones, chemicals, and contaminants including glyphosate residue – they post the lab results on their product listings.
Grass-Fed Bovine Hydrolyzed Collagen (Collagen Peptides) – Dissolves easily in liquids, similar benefits to gelatin but may be slightly easier to digest (Save 10% with code MOMMYPOTAMUS10)
Grass-Fed Bovine Gelatin – Similar in benefits to hydrolyzed collagen, but because it gels it’s useful for making jello, gummies and other snacks (Save 10% with code MOMMYPOTAMUS10)
Type II Collagen– Capsules for joint support (Save 10% with code MOMMYPOTAMUS10)
Another good option that I have used and liked is Vital Proteins. Their marine collagen is sourced from wild-caught, non-GMO white fish off the coast of Alaska.
Other Nutrients Needed For Collagen Production
One important thing to note is that oral collagen supplements are mostly broken down by digestion, so we’re not absorbing and just redistributing them. Instead, we’re using them like a big pile of Legos that are just the right shape and size needed to build collagen in our bodies.
However, there are a few additional nutrients that are also required for making collagen. If we stick to the Lego analogy, they’re the hands that move the Legos into place.
Vitamin C
Our bodies make collagen by combining two amino acids (glycine and proline) together using enzymatic processes that are activated by vitamin C. (20) That’s why even a mild vitamin C deficiency can lower collagen production. (21)
As a bonus, vitamin C also inhibits the molecules that break down collagen (matrix metalloprotienases or MMPs for short). (22)
The best sources of Vitamin C are sauerkraut, citrus fruits, strawberries, kiwi, cauliflower, broccoli, tomatoes, dark greens, and peppers. A note that vitamin C is destroyed when exposed to heat, so eat these foods raw to gain the maximum benefit.
Copper & Zinc
Like vitamin C, copper and zinc also activate enzymes that are needed for collagen production.
Good sources of copper are cashews, oysters, crab and sunflower seeds. Beef liver is also very rich in copper – I take it in capsule form daily.
Zinc can be found in oysters, poultry, meat, pumpkin seeds, cashews, almonds and dairy products.
Does collagen have side effects?
Collagen is generally well-tolerated, but some people have reported mild effects like stomach upset or heartburn when taking it. (23)
It is important to note, though, that if you’re allergic to the source of the collagen (beef, fish, etc.) you should avoid foods made with it.
Collagen Gummies
Collagen-Rich Recipes To Try
Recipe Made With Gelatin
Homemade bone broth
Elderberry gummies
Sour gummy stars
Strawberry jello
Lemon jello
Vitamin C gummies
Homemade marshmallows
Recipes Made With Collagen Peptides
In addition to stirring it into your morning coffee or tea, collagen peptides can be added to:
Copycat Orange Julius
Key lime pie avocado smoothie
Chocolate peppermint smoothie
Sources
1. Advances In Clinical Chemistry (2015) Collagens
2. Choi, Franchesca et. al. (2019) Oral Collagen Supplementation: A Systematic Review of Dermatological Applications
3. Proksch, E et.al. (2014) Oral supplementation of specific collagen peptides has beneficial effects on human skin physiology: a double-blind, placebo-controlled study
4. Borumand, Maryam and Sibila, Sara (2015) Effects of a nutritional supplement containing collagen peptides on skin elasticity, hydration and wrinkles
5. Schwartz, Stephen and Park, Joosang (2012) Ingestion of BioCell Collagen(®), a novel hydrolyzed chicken sternal cartilage extract; enhanced blood microcirculation and reduced facial aging signs
6. Borumand, Maryam and Sibila, Sara (2014) Daily consumption of the collagen supplement Pure Gold Collagen®reduces visible signs of aging.
7. Hexsel, Doris et. al. (2017) Oral supplementation with specific bioactive collagen peptides improves nail growth and reduces symptoms of brittle nails
8. Breus, Michael (2019) 4 Sleep Benefits of Glycine
9. Leu-Semenescu, Smaranda et. al. (2010) Sleep and rhythm consequences of a genetically induced loss of serotonin
10. Clark, Kristine et. al. (2008) 24-Week study on the use of collagen hydrolysate as a dietary supplement in athletes with activity-related joint pain
11. Schauss, Alexander (2012) Effect of the novel low molecular weight hydrolyzed chicken sternal cartilage extract, BioCell Collagen, on improving osteoarthritis-related symptoms: a randomized, double-blind, placebo-controlled trial
12. Bello, Alfonso and Oesser, Steffen (2006) Collagen hydrolysate for the treatment of osteoarthritis and other joint disorders: a review of the literature
13. Zdzieblik, Denise et. al. (2015) Collagen peptide supplementation in combination with resistance training improves body composition and increases muscle strength in elderly sarcopenic men: a randomised controlled trial
14. Zhong, Zhi et. al. (2003) L-Glycine: a novel antiinflammatory, immunomodulatory, and cytoprotective agent
15. Effenberger-Neidnicht, Katharina et. al. (2014) Glycine selectively reduces intestinal injury during endotoxemia
16. Tomosugi, Naohisa et. al. (2017) Effect of Collagen Tripeptide on Atherosclerosis in Healthy Humans
17. Brett, David (2008) A Review of Collagen and Collagen-based Wound Dressings
18. Kwon Lee, S et. al. (2006) Pressure ulcer healing with a concentrated, fortified, collagen protein hydrolysate supplement: a randomized controlled trial
19. Feng, Xu (2009) Chemical and Biochemical Basis of Cell-Bone Matrix Interaction in Health and Disease
20. Boyera, N et.al. (1998) Effect of vitamin C and its derivatives on collagen synthesis and cross-linking by normal human fibroblasts
21. Schagen, Silke K. et. al. (2012) Discovering the link between nutrition and skin aging
22. Saokar Telang, Pumori (2013) Vitamin C in dermatology
23. Moskowitz, R W (2000) Role of collagen hydrolysate in bone and joint disease